Table of Contents
Introduction
How much time does your business lose to scheduling?
Think about it honestly. A prospect says they are interested in a call. You reply suggesting Tuesday at 3pm. They say Tuesday does not work, how about Thursday? You check your calendar — Thursday you have a client visit in the morning, could do 2pm or 4pm. They reply that 2pm works. You send a calendar invite. They confirm. Four email exchanges and two days later, you have a 30-minute call booked.
Multiply this by every meeting you schedule every week — client calls, team check-ins, demos, discovery calls, interviews, consultations — and the back-and-forth email chain is consuming hours of productive time that could be spent on actual work.
Calendly eliminates this entirely.
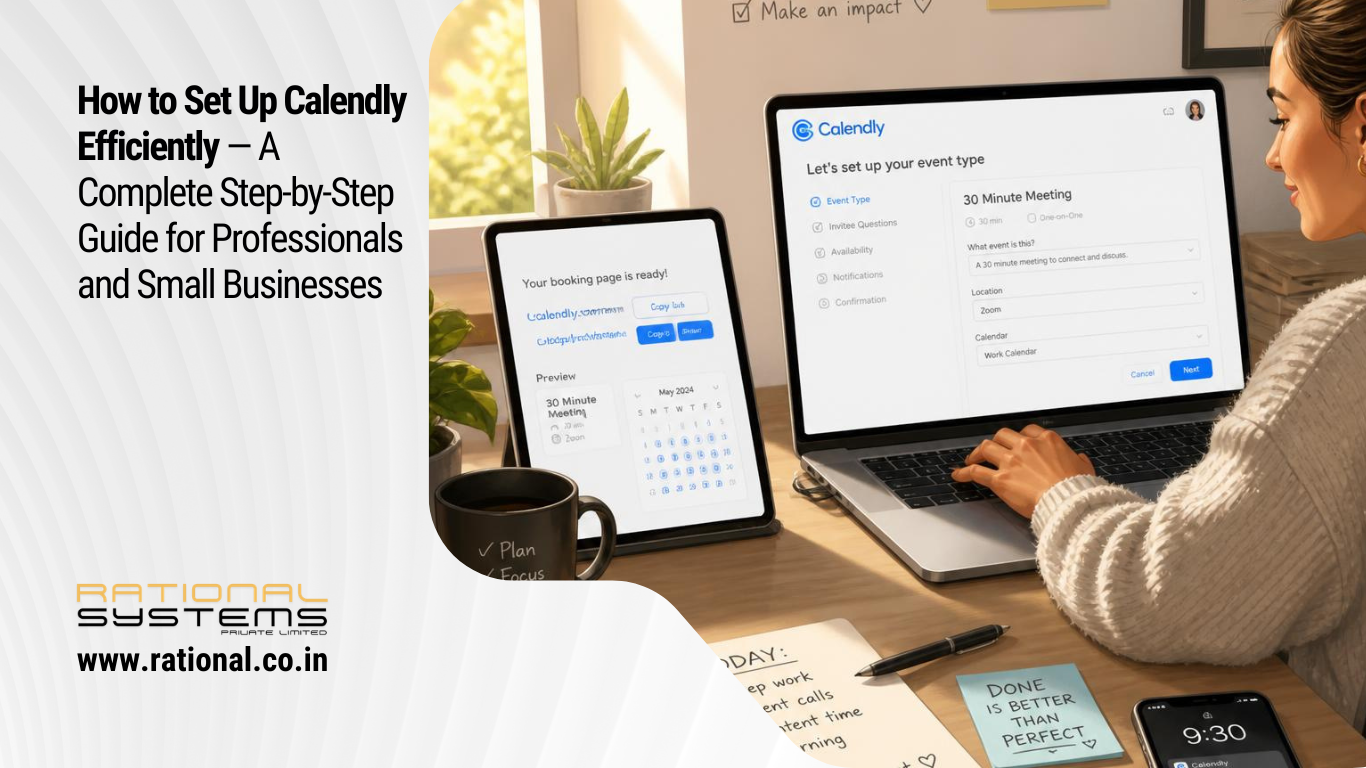
Calendly is a meeting scheduling platform that lets you share a link — one link — with anyone you want to meet. They click it, see your real-time availability, pick a time that works for them, and the meeting is automatically added to both your calendars. No emails. No back-and-forth. No double-booking. No “does Thursday work for you?”
It is one of the most immediately impactful productivity tools available to professionals and small businesses — and it takes less than 30 minutes to set up correctly.
In this guide, we will walk through every step of setting up Calendly efficiently: from creating your account and configuring your availability to setting up event types, customising booking pages, enabling AI meeting tools, integrating with your calendar and video conferencing platforms, and getting your scheduling link in front of the right people.
By the end of this guide, your Calendly will be fully configured, professionally presented, and ready to eliminate scheduling friction from your business permanently.
What Is Calendly and Why Does It Matter for Your Business?
Before the step-by-step setup, a brief explanation of what Calendly actually is — because understanding the platform’s logic makes the setup decisions much clearer.
Calendly is a cloud-based scheduling automation platform that connects to your calendar — Google Calendar, Outlook, Office 365, or iCloud — reads your availability in real time, and presents a booking page where others can schedule time with you based on the rules you define.
You define:
- Which days and hours you are available for meetings
- What types of meetings you offer (15-minute intro call, 30-minute consultation, 60-minute strategy session)
- How much buffer time you need between meetings
- How far in advance someone can book
- How much notice you require before a meeting
- Any questions you want answered before someone books
Calendly enforces all of these rules automatically. If your calendar shows you are in a meeting from 2pm to 3pm on Thursday, Calendly will not allow anyone to book a slot overlapping with that time. If you set a minimum 24-hour notice requirement, nobody can book a same-day call. If you want a 15-minute gap between every meeting, Calendly builds it in automatically.
The result is a scheduling system that works exactly the way you want it to — without you managing it manually.
Calendly now also incorporates AI meeting tools — including meeting transcription, AI-generated summaries, action item extraction, and smart scheduling recommendations — making it a comprehensive meeting management platform rather than just a booking tool.
Plans and Pricing: Choosing the Right Tier
Calendly offers several plan tiers. Here is what each covers:
Free Plan — One active event type, basic scheduling features, Calendly branding on booking pages, connects to one calendar. Good for individuals just getting started or testing the platform.
Standard Plan (approximately $10/month) — Unlimited event types, basic integrations, email reminders and follow-ups, ability to remove Calendly branding. Suitable for individual professionals who book multiple types of meetings.
Teams Plan (approximately $16/month per seat) — All Standard features plus round-robin scheduling, collective scheduling, team management, advanced integrations, and routing forms. Suitable for small businesses with multiple team members who need to coordinate scheduling.
Enterprise Plan (custom pricing) — Advanced security, SSO, dedicated support, compliance features. For large organisations.
For most professionals and small businesses in India, the Standard plan is the right starting point — it removes the branding limitation and unlocks the full event type flexibility that makes Calendly genuinely useful as a professional tool.
The AI meeting tools — Calendly’s meeting intelligence features — are available as an add-on or included in higher-tier plans depending on current pricing. Check Calendly’s current pricing page at calendly.com/pricing for the most current rates.
Step-by-Step Setup Guide
STEP 1: Create Your Calendly Account
Go to calendly.com and click “Get Started”
You will be prompted to sign up with:
- Google account (recommended if you use Google Calendar and Gmail)
- Microsoft account (recommended if you use Outlook or Office 365)
- Email and password (if you prefer a separate login)
Recommendation: Sign up with the same account you use for your primary work calendar. This simplifies the calendar connection in the next step and ensures Calendly has real-time access to your availability from the start.
Enter your details:
- Full name — this will appear on your booking page and in all scheduling emails sent to clients
- Company or organisation name — appears on your booking page
- Your role or job title — shown in booking confirmation emails
Choose your Calendly link (username):
Your Calendly link will be: calendly.com/yourusername
Choose a username that is:
- Professional and recognisable — your name, your business name, or a combination
- Easy to type and share verbally — avoid complex combinations of letters and numbers
- Consistent with your other professional handles
Examples:
- calendly.com/sumitthukral
- calendly.com/rationalsystems
- calendly.com/sumitrational
This URL is permanent once set, so choose carefully. You can update your display name later but the URL slug is fixed on the free and standard plans.
STEP 2: Connect Your Calendar
This is the most important step in the setup. Calendly’s entire functionality depends on reading your real calendar availability in real time.
Go to: Account → Calendar Connections (or the setup wizard will prompt you)
Connect your primary calendar:
For Google Calendar users:
- Click “Connect Google Calendar”
- Sign in with your Google account
- Grant Calendly permission to view and manage your calendar events
- Select which calendar Calendly should check for conflicts (your primary calendar is pre-selected)
- Select which calendar new bookings should be added to
For Outlook / Office 365 users:
- Click “Connect Office 365” or “Connect Outlook”
- Sign in with your Microsoft account
- Grant the required permissions
- Select your primary calendar for conflict checking and new booking additions
For iCloud users:
- Go to your Apple ID settings and generate an app-specific password for Calendly
- Enter your Apple ID email and the app-specific password in Calendly
- Select your primary iCloud calendar
Multiple calendar connections:
On paid plans, you can connect multiple calendars — for example, both your Google Calendar and your Outlook calendar. Calendly will check all connected calendars for conflicts, preventing double-bookings even if your meetings are spread across different calendar accounts.
This is particularly useful if:
- You use one calendar for work and another for personal appointments
- You manage both a Google Workspace calendar and a personal Gmail calendar
- You have a shared team calendar you need to check alongside your personal one
STEP 3: Set Your Availability Schedule
Your availability schedule defines when Calendly will allow bookings. This is the foundation of your scheduling setup — get this right and everything else works smoothly.
Go to: Availability (in the left sidebar)
Create or edit your default schedule:
Calendly creates a default schedule (typically Monday to Friday, 9am to 5pm) that you can edit.
Set your working hours:
For each day of the week, set:
- Whether you are available that day (toggle on/off)
- Your available time range — from what time to what time
Practical recommendations:
Do not set your availability to match your entire working day. Consider the following:
- Leave the first 30–60 minutes of your day unblocked for email, planning, and preparation before the first call
- Leave the last 30–60 minutes of your day unblocked for follow-up and end-of-day tasks
- Block your lunch hour if you want a guaranteed break — Calendly will not protect it unless you either block it on your calendar or exclude it from your availability window
- Consider which days you want to protect from external meetings — many professionals block Mondays or Fridays as no-meeting days to maintain focus time
Example schedule for a consultant:
- Monday: Unavailable (deep work day)
- Tuesday: 10:00 AM – 5:00 PM
- Wednesday: 10:00 AM – 5:00 PM
- Thursday: 10:00 AM – 5:00 PM
- Friday: 10:00 AM – 1:00 PM
Set your time zone:
Verify your time zone is set correctly — particularly important if you meet with clients in different regions of India or internationally. Calendly automatically shows your availability in the invitee’s local time zone when they view your booking page, which eliminates time zone confusion entirely.
Create multiple schedules:
On paid plans, you can create multiple named availability schedules and assign different event types to different schedules. For example:
- “Client Calls” schedule — Tuesday, Wednesday, Thursday, 10am–4pm
- “Internal Meetings” schedule — any weekday, 9am–6pm
- “Webinars” schedule — Friday afternoons only
STEP 4: Configure Your Event Types
Event types are the meeting formats you offer. Each event type has its own duration, availability rules, location settings, confirmation flow, and booking page. Setting these up correctly is where Calendly goes from a basic scheduling tool to a genuinely professional client-facing system.
Go to: Event Types → + New Event Type
Choose the event type format:
One-on-One — a meeting between you and one other person. The most common format for client calls, consultations, and discovery meetings.
Group — a meeting where multiple people book the same time slot. Useful for webinars, group training sessions, or workshops where multiple participants attend simultaneously.
Collective — a meeting that requires multiple hosts to be available simultaneously. Requires the Teams plan. Useful when a client call needs to include two or more team members.
Round Robin — a meeting automatically assigned to whichever team member is available, distributing bookings across the team. Requires the Teams plan. Useful for inbound sales enquiries or support calls.
For individual professionals, One-on-One is the format you will use for most or all event types.
Configure each event type:
Event name:
Be specific and descriptive. Not “Meeting” — but “30-Minute IT Consultation” or “Free Wi-Fi Audit Booking” or “15-Minute Discovery Call.” The event name appears on your booking page and in all confirmation emails — it should tell the invitee exactly what they are booking.
Duration:
Set the meeting length. Common durations:
- 15 minutes — quick intro call, pre-qualification
- 30 minutes — discovery call, initial consultation
- 60 minutes — detailed consultation, strategy session, demo
- 90 minutes — workshop, deep-dive session
Location:
Define how the meeting will take place. Options include:
- Zoom — generates a unique Zoom link automatically for each booking (requires Zoom integration — see Step 6)
- Google Meet — generates a Google Meet link automatically (requires Google Calendar connection)
- Microsoft Teams — generates a Teams link automatically (requires Office 365 connection)
- Phone call — Calendly asks the invitee to provide their phone number at booking, or asks you to call them
- In person — specify an address that will be included in the confirmation
- Custom — enter any other video conferencing link or location
Recommendation: Use an automatically generated video conferencing link (Zoom, Google Meet, or Teams) wherever possible. This eliminates the step of manually creating and sharing a link for every meeting, and ensures the link is included automatically in the confirmation email and calendar invite.
Availability:
Choose which availability schedule this event type uses (if you have created multiple schedules as described in Step 3).
Scheduling notice (minimum notice):
The minimum amount of time in advance someone must book. Recommended settings:
- For same-day availability: 1–2 hours
- For next-day availability: 24 hours
- For planned consultations: 48 hours
This prevents people from booking a call in 20 minutes when you are in the middle of something else.
Date range:
How far in advance someone can book. Options:
- Rolling window (e.g., “bookings available up to 60 days in advance”) — most practical for ongoing availability
- Fixed date range — useful for a specific event or campaign period
- Indefinitely into the future — not recommended as it makes your calendar hard to manage
Recommended: 30 to 60 days rolling window for most professionals.
Buffer time:
Padding before and/or after each meeting. Recommended:
- 10–15 minutes after each meeting — gives you time to take notes, send a follow-up email, and mentally transition before the next call
- 10 minutes before each meeting — preparation time, particularly for calls with new clients
Without buffer time, back-to-back bookings leave you jumping from one call to the next with no transition time — a common source of burnout for heavy calendar users.
Daily meeting limit:
Maximum number of this event type that can be booked per day. If you do not want more than three client calls in a single day, set the daily limit to three. Calendly stops accepting bookings for that day once the limit is reached.
STEP 5: Customise Your Booking Questions
Every event type can include custom questions that invitees answer when booking. This is one of the most underused features in Calendly — and one of the most valuable for professionals who want to arrive at every meeting prepared.
Go to: Event Type → Edit → Booking Questions
Default questions included:
- Name (required, cannot be removed)
- Email (required, cannot be removed)
Add custom questions:
Click “Add New Question” and choose from:
- Short text answer
- Long text answer (paragraph)
- Dropdown selection
- Checkboxes (multiple selection)
- Radio buttons (single selection)
- Phone number
Recommended questions for a client discovery call:
- “What is your company name and what does your business do?” (Short text — required)
- “What is the primary reason you are booking this call today?” (Long text — required)
- “How many employees does your organisation have?” (Dropdown — 1-10 / 11-50 / 51-200 / 200+)
- “Where did you hear about us?” (Dropdown — LinkedIn / Google / Referral / Existing client / Other)
- “Is there anything specific you would like to cover in this call?” (Long text — optional)
For a managed wireless site survey booking:
- “What type of property is the survey for?” (Dropdown — Home / Office / School / Hotel / Other)
- “Approximate size of the property in square feet?” (Short text)
- “How many floors does the property have?” (Short text)
- “Do you have an existing Wi-Fi setup?” (Radio — Yes / No)
- “Briefly describe the Wi-Fi problem you are experiencing” (Long text — required)
Why this matters: Arriving at every call with this information already collected means you can prepare relevant notes, avoid spending the first 10 minutes on basic context-gathering, and demonstrate to the client that you take their time seriously.
STEP 6: Set Up Integrations
Calendly’s integrations are what transform it from a standalone scheduling tool into a connected part of your business workflow. Here are the key integrations to configure.
Go to: Integrations (in the left sidebar)
Video Conferencing Integration:
Zoom:
- Click “Zoom” in the integrations list
- Click “Connect” and sign in with your Zoom account
- Authorise Calendly to create meetings on your behalf
- Once connected, select “Zoom” as the location in any event type — Calendly automatically generates a unique Zoom link for every booking
Google Meet:
- If your calendar is connected via Google Calendar, Google Meet integration is automatic — select “Google Meet” as the location in any event type
Microsoft Teams:
- Connect your Office 365 account in calendar connections
- Select “Microsoft Teams” as the location in event types — links are generated automatically
CRM Integration:
If your business uses a CRM — HubSpot, Salesforce, Zoho CRM, or another platform — connecting it to Calendly automatically creates or updates contact records and logs meeting activity when someone books through Calendly.
HubSpot:
- Click “HubSpot” in integrations
- Sign in with your HubSpot account
- Map Calendly booking fields to HubSpot contact properties
- Every new Calendly booking automatically creates a contact and logs the meeting in HubSpot
Zoho CRM:
- Click “Zoho CRM” in integrations
- Authorise the connection
- Configure field mapping between Calendly booking questions and Zoho CRM fields
Why this matters for small businesses: Without CRM integration, every Calendly booking requires you to manually create a contact record and log the meeting. With CRM integration, this happens automatically — every person who books through Calendly is captured in your CRM with their details and booking context.
Email Marketing Integration:
Mailchimp / Zoho Campaigns:
Connect your email marketing platform so that every new Calendly booking automatically adds the invitee to a specific email list or audience — enabling automatic follow-up sequences, newsletter subscriptions, or nurture campaigns triggered by a meeting booking.
Zapier / Make (Automation):
For custom integrations not natively supported by Calendly, Zapier and Make (formerly Integromat) provide no-code automation connectors. Examples:
- New Calendly booking → Send a WhatsApp message via WhatsApp Business API
- New Calendly booking → Add a row to Google Sheets with booking details
- New Calendly booking → Create a task in Asana or Trello
- Meeting completed → Send an automatic follow-up email via Gmail
LinkedIn Integration:
Calendly can be connected to LinkedIn to make your scheduling link available directly from your LinkedIn profile. Go to your LinkedIn profile → Edit → Contact Info → Add your Calendly URL as your website. Alternatively, add it to your LinkedIn headline or About section.
STEP 7: Customise Your Booking Page
Your Calendly booking page is a client-facing asset — the page a prospect sees when they click your scheduling link. It should look professional and consistent with your brand.
Go to: Account → Profile (for account-level branding) or Event Type → Edit → Appearance (for event-level customisation)
Profile photo or logo:
Upload a professional headshot (for individual professionals) or your company logo (for businesses). This appears on every booking page and in all scheduling emails. A professional photo significantly increases booking completion rates — a booking page with a photo is more trustworthy than one without.
Cover image:
Upload a branded banner image — your company colours, a professional photograph, or a simple branded graphic. Dimensions: 1200 x 800 pixels recommended.
Calendly link customisation:
Ensure your Calendly username (calendly.com/yourusername) is professional and matches your brand as discussed in Step 1.
Welcome message:
Add a brief welcome message that appears at the top of your booking page — explaining what the invitee is booking, what to expect, and any preparation they should do before the meeting.
Example welcome message for a discovery call:
“Thank you for your interest in Rational Systems. This 30-minute call is an opportunity to understand your IT infrastructure requirements and explore how we can help. Please have a brief description of your current setup and your primary challenges ready — it will help us make the most of our time together.”
Colour theme:
On paid plans, customise the accent colour of your booking page to match your brand colours. This replaces Calendly’s default blue with your brand colour — a small detail that makes a meaningful difference to how the page presents to clients.
Remove Calendly branding:
On Standard plan and above, remove the “Powered by Calendly” footer from your booking page — presenting a cleaner, more professional appearance.
STEP 8: Configure Notifications and Reminders
Automated notifications and reminders are one of Calendly’s most valuable features for reducing no-shows and ensuring both parties arrive at every meeting prepared.
Go to: Event Type → Edit → Notifications and Cancellation Policy
Confirmation email (automatic):
Sent immediately when a booking is made. Includes meeting details, video conferencing link, and any calendar file attachments. This is always sent automatically — customise the message to include preparation instructions or any additional information the invitee needs.
Reminder emails:
Configure automatic reminder emails sent before each meeting:
- 24 hours before — the most important reminder. Reduces no-shows significantly. Include the meeting link and any preparation reminders.
- 1 hour before — a second reminder for time-sensitive calls. Include the video link prominently.
Example 24-hour reminder message:
“This is a reminder that we have a 30-minute IT consultation scheduled for tomorrow at [time]. Your video call link is: [link]. If you need to reschedule, please use the link in the original confirmation email. Looking forward to speaking with you.”
SMS reminders:
On paid plans, SMS reminders can be sent in addition to email reminders — particularly effective for reducing no-shows from mobile-first clients.
Follow-up emails:
Configure an automatic follow-up email sent after the meeting — thanking the invitee, summarising any next steps, and including a link to book another meeting if appropriate.
Cancellation policy:
Set a minimum notice period for cancellations — for example, requiring at least 24 hours notice to cancel or reschedule. Include your cancellation policy in the booking page so invitees are informed before they book.
STEP 9: Set Up Calendly’s AI Meeting Tools
Calendly has expanded significantly beyond scheduling into AI-powered meeting intelligence. These features are available on certain plans and as add-ons — check current availability at calendly.com.
Meeting Transcription:
Calendly can automatically transcribe your meetings using AI — converting spoken conversation to text in real time. The transcript is stored and searchable after the meeting, making it easy to reference what was discussed, what was agreed, and what was promised.
To enable:
- Go to Meeting Intelligence in your Calendly settings
- Connect your video conferencing platform (Zoom, Google Meet, or Teams)
- Enable transcription for specific event types
AI Meeting Summaries:
After each meeting, Calendly’s AI generates an automatic summary — a structured overview of what was discussed, the key points covered, and the context of the conversation. The summary is delivered by email and stored in your Calendly dashboard.
This eliminates the need to:
- Take detailed notes during every call (you can focus on the conversation)
- Write up a post-meeting summary from memory
- Search through a full transcript for a specific point that was made
Action Item Extraction:
Calendly’s AI identifies and extracts action items from the meeting transcript — specific commitments, tasks, and next steps discussed during the call. These are presented as a structured list in the post-meeting summary.
Example output after a 30-minute client discovery call:
Meeting Summary: Discussed the client’s current IT infrastructure — a 15-person office in Gurugram using a consumer router and three unmanaged switches. Primary problems: Wi-Fi dead zones in the conference room, no network segmentation, and a backup process that has not been tested.
Action Items:
→ Rational Systems: Send preliminary Wi-Fi site survey proposal by Friday
→ Rational Systems: Share case study of similar office deployment
→ Client: Confirm approximate floor plan dimensions for the office
→ Schedule follow-up call for next week after proposal review
Smart Scheduling Suggestions:
Calendly’s AI analyses your meeting patterns and suggests optimisations — recommending which types of meetings could be shorter, identifying days with heavy meeting loads, and suggesting scheduling adjustments to protect focus time.
To enable AI features:
Go to Account Settings → Meeting Intelligence and follow the setup prompts. Connect your video conferencing platform and grant the necessary permissions. Note that AI transcription requires the invitee’s awareness and consent — Calendly handles the disclosure automatically at the start of each recorded session.
STEP 10: Share Your Calendly Link
The final step is getting your Calendly link in front of the right people. A perfectly configured Calendly account creates zero value until people are using it to book time with you.
Your primary Calendly link:
calendly.com/yourusername — links to your main booking page showing all your event types.
Individual event type links:
Each event type has its own specific link — e.g., calendly.com/yourusername/30-minute-discovery-call. Use specific event type links when you know exactly what kind of meeting you are offering someone.
Where to share your Calendly link:
Email signature:
Add your Calendly link to your email signature — the highest-impact placement for professionals who send a lot of email. Format it as a simple call to action:
“📅 Schedule a call with me: calendly.com/yourusername”
LinkedIn profile:
Add your Calendly link to:
- Your LinkedIn Contact Info (Website field)
- Your LinkedIn About section (“Book a call: calendly.com/yourusername”)
- Your LinkedIn featured section — add it as a link with a custom title and thumbnail
WhatsApp Business profile:
Add your Calendly link to your WhatsApp Business profile website field and in your automated greeting message.
Website:
Add your Calendly link — or embed your booking widget directly — to:
- Your website’s Contact page
- Your About page
- Any service page with a CTA
- Blog post CTAs (“Book a free consultation”)
Embed the Calendly widget on your website:
Go to any event type → Share → Embed. Copy the embed code and add it to your website. The Calendly booking calendar appears directly on your web page — visitors can book without leaving your site.
WordPress users: Calendly provides a WordPress plugin that simplifies embedding. Search “Calendly” in the WordPress plugin directory.
In email outreach:
When following up with a prospect or responding to an inbound enquiry, include your Calendly link directly in the email rather than asking when they are available:
“I would love to learn more about your requirements. Feel free to book a 30-minute call at a time that suits you: calendly.com/yourusername/discovery-call”
In LinkedIn messages:
When a prospect engages with your LinkedIn content or sends a connection request with genuine interest, share your Calendly link directly in the reply rather than asking for their availability.
In your blog and content:
Every blog article should end with a CTA that includes your Calendly link — as we do at Rational Systems on every article we publish.
Advanced Tips for Getting the Most From Calendly
Once your basic setup is complete, these advanced configurations make Calendly even more powerful:
Create a “Free Consultation” event type with a dedicated landing page description — make it clear what the invitee will get from the 30 minutes, what you will cover, and what they should prepare. A well-described free consultation booking page converts significantly better than a generic one.
Use routing forms (Teams plan) — if you have multiple team members or multiple types of meetings, routing forms ask invitees a qualifying question first and then direct them to the appropriate event type or team member automatically.
Set meeting limits strategically — use the daily meeting limit and availability window settings to protect your most productive working hours. If you do your best client work in the mornings, make afternoons your meeting hours.
Create a “VIP” availability schedule — on paid plans, create a separate event type with wider availability for your most important client relationships, while keeping a more restricted schedule for new enquiries.
Use UTM parameters to track booking sources — add UTM parameters to your Calendly links when sharing them in different channels (LinkedIn, email, website). This lets you track in Google Analytics which channel drives the most bookings.
Integrate with your CRM’s deal pipeline — use Zapier or native CRM integrations to automatically create a deal or opportunity in your CRM when someone books a discovery call. This ensures no booked meeting falls through the CRM cracks.
Common Mistakes to Avoid
Setting your full working day as available. This leads to back-to-back bookings with no transition time, no preparation time, and no recovery time. Be intentional about which hours you make available.
Not adding buffer time between meetings. Even 10 minutes between calls makes a significant difference to your ability to take notes, follow up, and arrive at the next call focused.
Not adding booking questions. Arriving at a call with no prior context about why someone booked means spending the first 10 minutes on information you could have collected before the call started.
Using your full name as every event type. Event types should describe what the meeting is, not who it is with. “30-Minute IT Consultation” is more useful to an invitee than “Meeting with Sumit.”
Not testing your booking page. Before sharing your Calendly link publicly, book a test meeting yourself using a different browser or email account — go through the entire booking flow as a client would experience it.
Setting availability too far in advance. Opening your calendar 6 months into the future creates scheduling complexity and may commit you to meeting patterns that do not suit your future schedule. 30 to 60 days is sufficient for most professionals.
Not customising reminder emails. The default Calendly reminder emails are functional but generic. Customised reminders that feel personal reduce no-shows and set a more professional tone before the meeting begins.
Conclusion
Calendly is one of the highest-return productivity investments available to any professional or small business — and the setup, done correctly, takes less than two hours from account creation to a fully configured, professionally presented booking system.
The time you recover from eliminated scheduling back-and-forth — across every meeting, every week, every month — compounds significantly over the course of a year. For a professional who schedules ten to fifteen meetings per week, the back-and-forth eliminated by Calendly represents several hours of recovered productive time every week.
More importantly, a Calendly link in your email signature, your LinkedIn profile, and your website CTAs creates a frictionless path from interest to conversation — removing the barrier between a prospect deciding they want to speak with you and actually getting that conversation on the calendar.
At Rational Systems, our Calendly link — calendly.com/rationalsystems — appears at the bottom of every blog article, every LinkedIn post, every email, and every proposal. Every lead generation effort we make points to a single, frictionless booking step.
That is the most efficient use of a scheduling tool. And it is set up in an afternoon.
Book a Free IT or Digital Marketing Consultation
If you would like help setting up Calendly, integrating it with your CRM or website, or building a broader lead generation system that turns your online presence into a consistent source of inbound enquiries — we are here.
📅 Book a free 30-minute consultation:
calendly.com/rationalsystems
📞 Call or WhatsApp: +91-9810017172
✉️ Email: info@rational.co.in
🌐 Website: rational.co.in